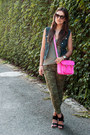
i'm super excited about this post because: 1. i feel like i haven't done a really cool diy in a looong time & 2. i'm debuting my first video! that i shot & edited all by myself!! so, you may have noticed my nails in this post and thought "what is that & how do i do it?" the answer is: water marble nails. and this post will show you how to do it!

this is not an easy diy. in fact, i didn't even do my own nails. the first time my friends and i tried this technique we spent 4 hours doing it, and i got so frustrated after i did my first nail that i gave up. luckily my bff anjelica has mastered the technique, so she did my nails for me (twice now)! and this time she let me film her doing her own nails for a video tutorial! although, sooner or later i'm going to have to figure out how to do this myself!

tools:
cup - choose one that was cheap & you don't like. you won't want to drink from it ever again.
room temp. water - must be the perfect temp otherwise it doesn't work. see tips below.
nail polish
nail polish remover
clear top coat
cotton balls
tape - doesn't have to be medical tape, that is just what we used.
toothpicks - a straight pin will work too
old paint brush - or a q-tip if you don't have a brush
patience!!


step 2: tape your fingers, leaving the nail exposed. if you don't do this you'll spend hours cleaning nail polish off your fingers!

step 3: start adding the drops of nail polish to your water, alternating the colors. a photo doesn't do this step justice, so check out the video:
a few tips:
- if the water is too cold, the polish will not spread as easily and will dry too quickly.
- if the water is too hot, the polish with drop the the bottom of the cup.
- unscrew the brushes from the bottles before you add the first drop.
- move as quickly as possible when adding the polish drops! if you take too long the polish dries and you have to start over.
- some polish brands work better than others. we had the best luck when at least one of the polishes was lili brand polish. china glaze is supposed to work good too. use cheap polish, you will waste a lot of it (no chanel!).repeat step 3 until you've done all your nails

step 4: once you've let your nails dry, remove the tape. use the brush dipped in nail polish remover to get any polish off your skin. apply a clear top coat. and you're done!


wow, this sounds a lot easier than it actually is. i would suggest watching at least 3 more video tutorials (there are TONS on youtube). even though its not easy, i love the way this technique looks! each nail had a different pattern, and no one will have the exact same pattern! has anyone tried out this technique? any tips to add? let me know in the comments!